Retailers can configure system and Custom fields to enable them to enter all the unique data required to generate a SKU. This article explains how to configure and manage these fields.
Loupe provides everything you need to integrate your existing ERP attributes, configure and manage your retail data set directly from our system:
| Parameter(s) | Capacity | Example | Configuration Options |
| SKU Category | 1 level, 1000 attributes | Test, Core, Clearance | API only |
| Merchandising Hierarchy | Up to 4 levels, 5000 attributes per level, dependencies between adjacent levels |
Department, Class, sub-Class |
API only |
| Custom | Up to 82 fields, 1000 attributes | Defect Code, Sales Tag Colour, Tariff Code | Manual or API |
⚠️ Warning before you start:
You will need to load your Foundational Data in order to populate any custom fields you create in Retail Data with your custom attributes. This is optional, attributes for custom fields created in Loupe can be managed entirely in our system.
You will need to load your Sku Category attributes, and Merchandising Heirarchy attributes in order to populate these specific fields which you can configure in Retail Data with your custom attributes. This can only be done via API.
💡 What can I manage with this feature?
Retail Data configuration allows an administrator to decide:
- How many custom fields are required
- What type of fields you require (eg type in versus drop-down)
- What name you wish to apply to each custom field
- What type of values should be contained in each field (numeric, alphanumeric etc)
- What data is required in order for a buyer to request a SKU
- Which fields should be visible to your vendors
- Which system (Loupe or your own) should be master / dependent for each field after your SKU has been applied
Remember: Only Administrators have permission to configure Retail Data
To manage your Retail Data fields, please follow these steps:
Step 1: Navigate to Settings > Integration > Manage Retail Data.
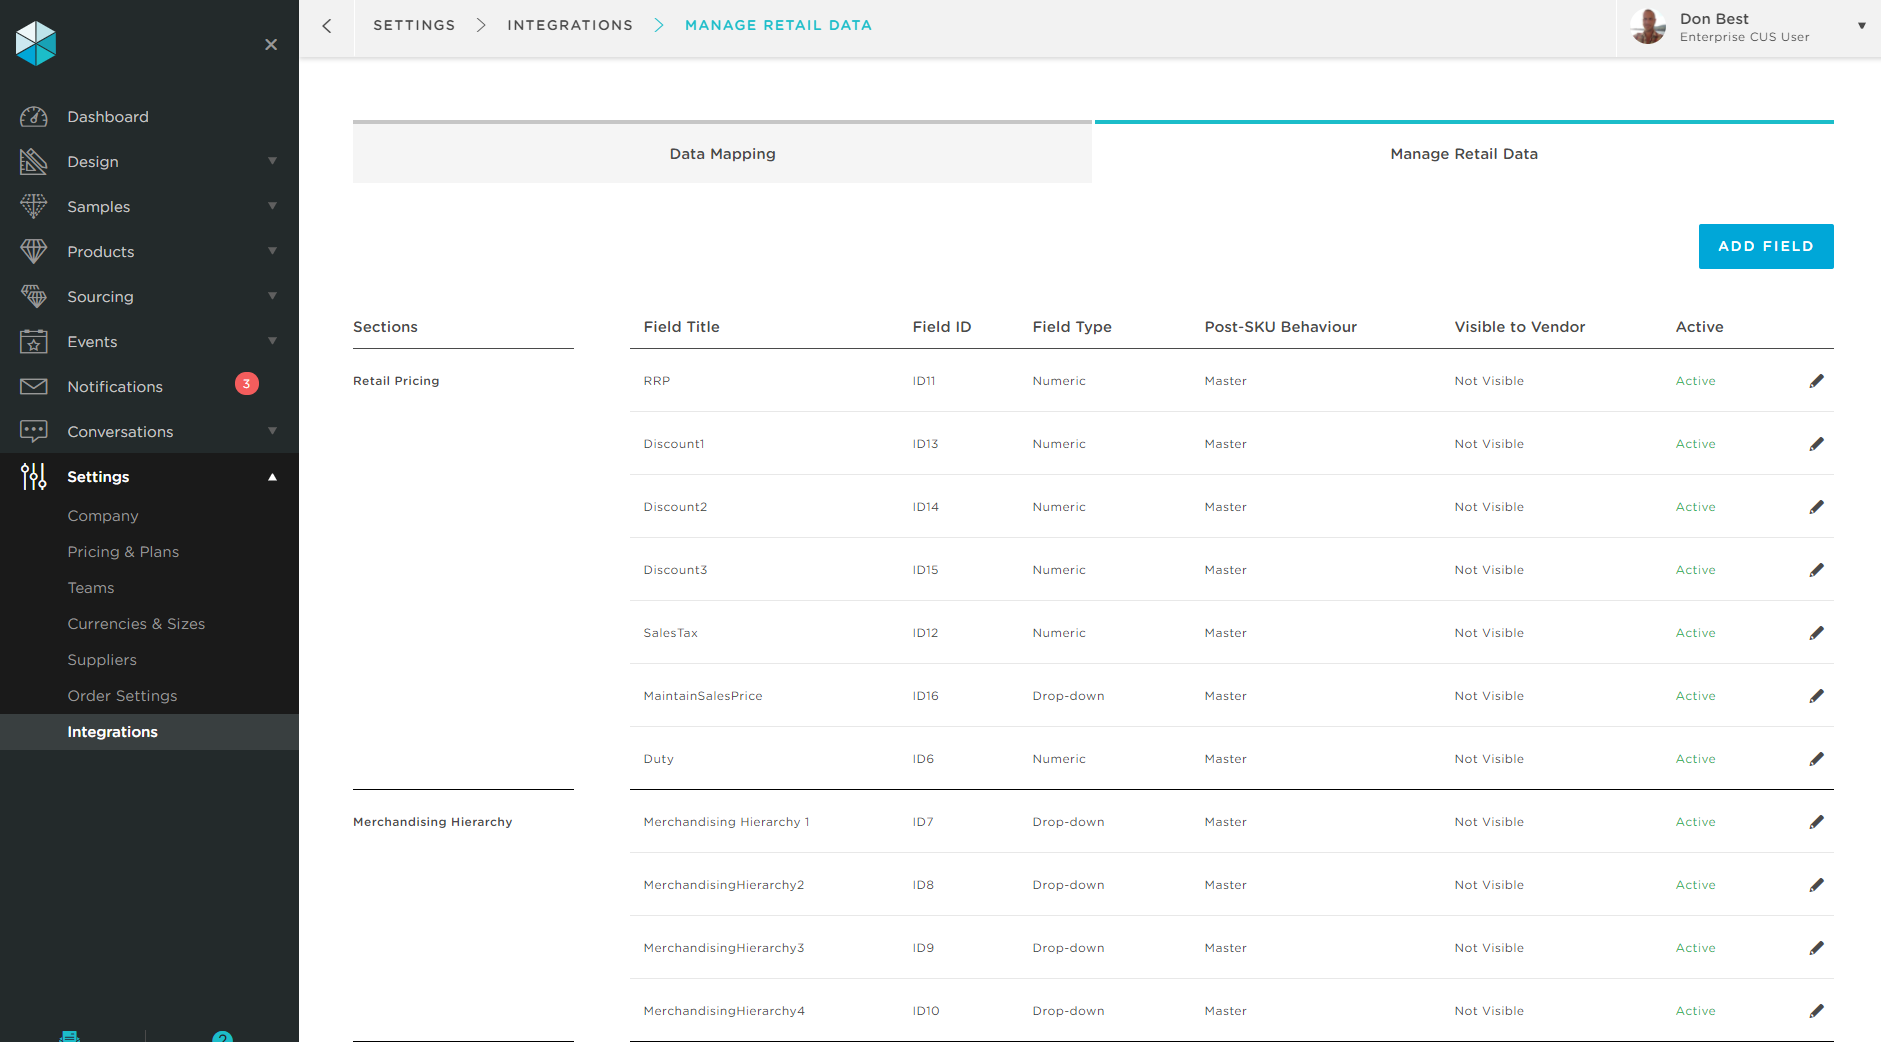
Step 2: Click Add Field CTA to start adding a new field.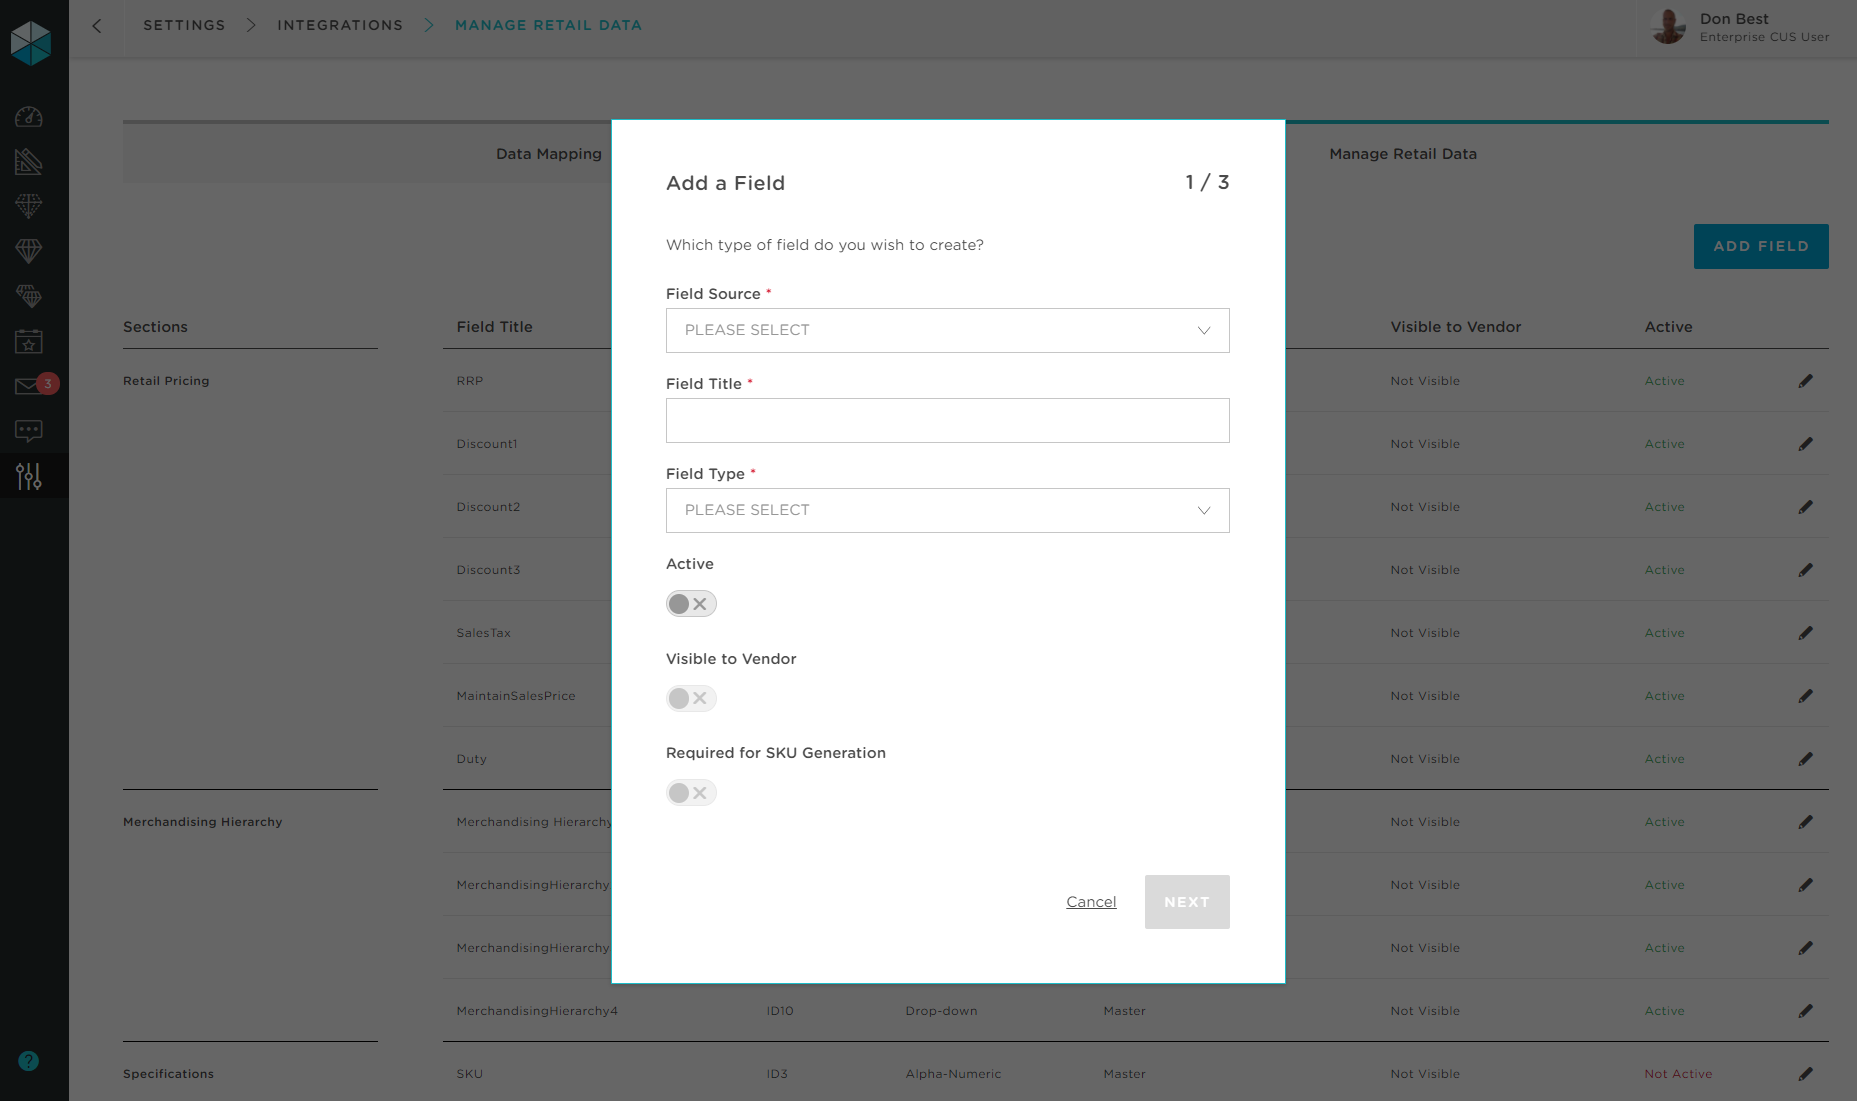
Step 3: Choose the source of the field, have you already delivered your attributes via the Foundational Data API? or would you like to add a Custom field? (see Warning at top of this page for more information). 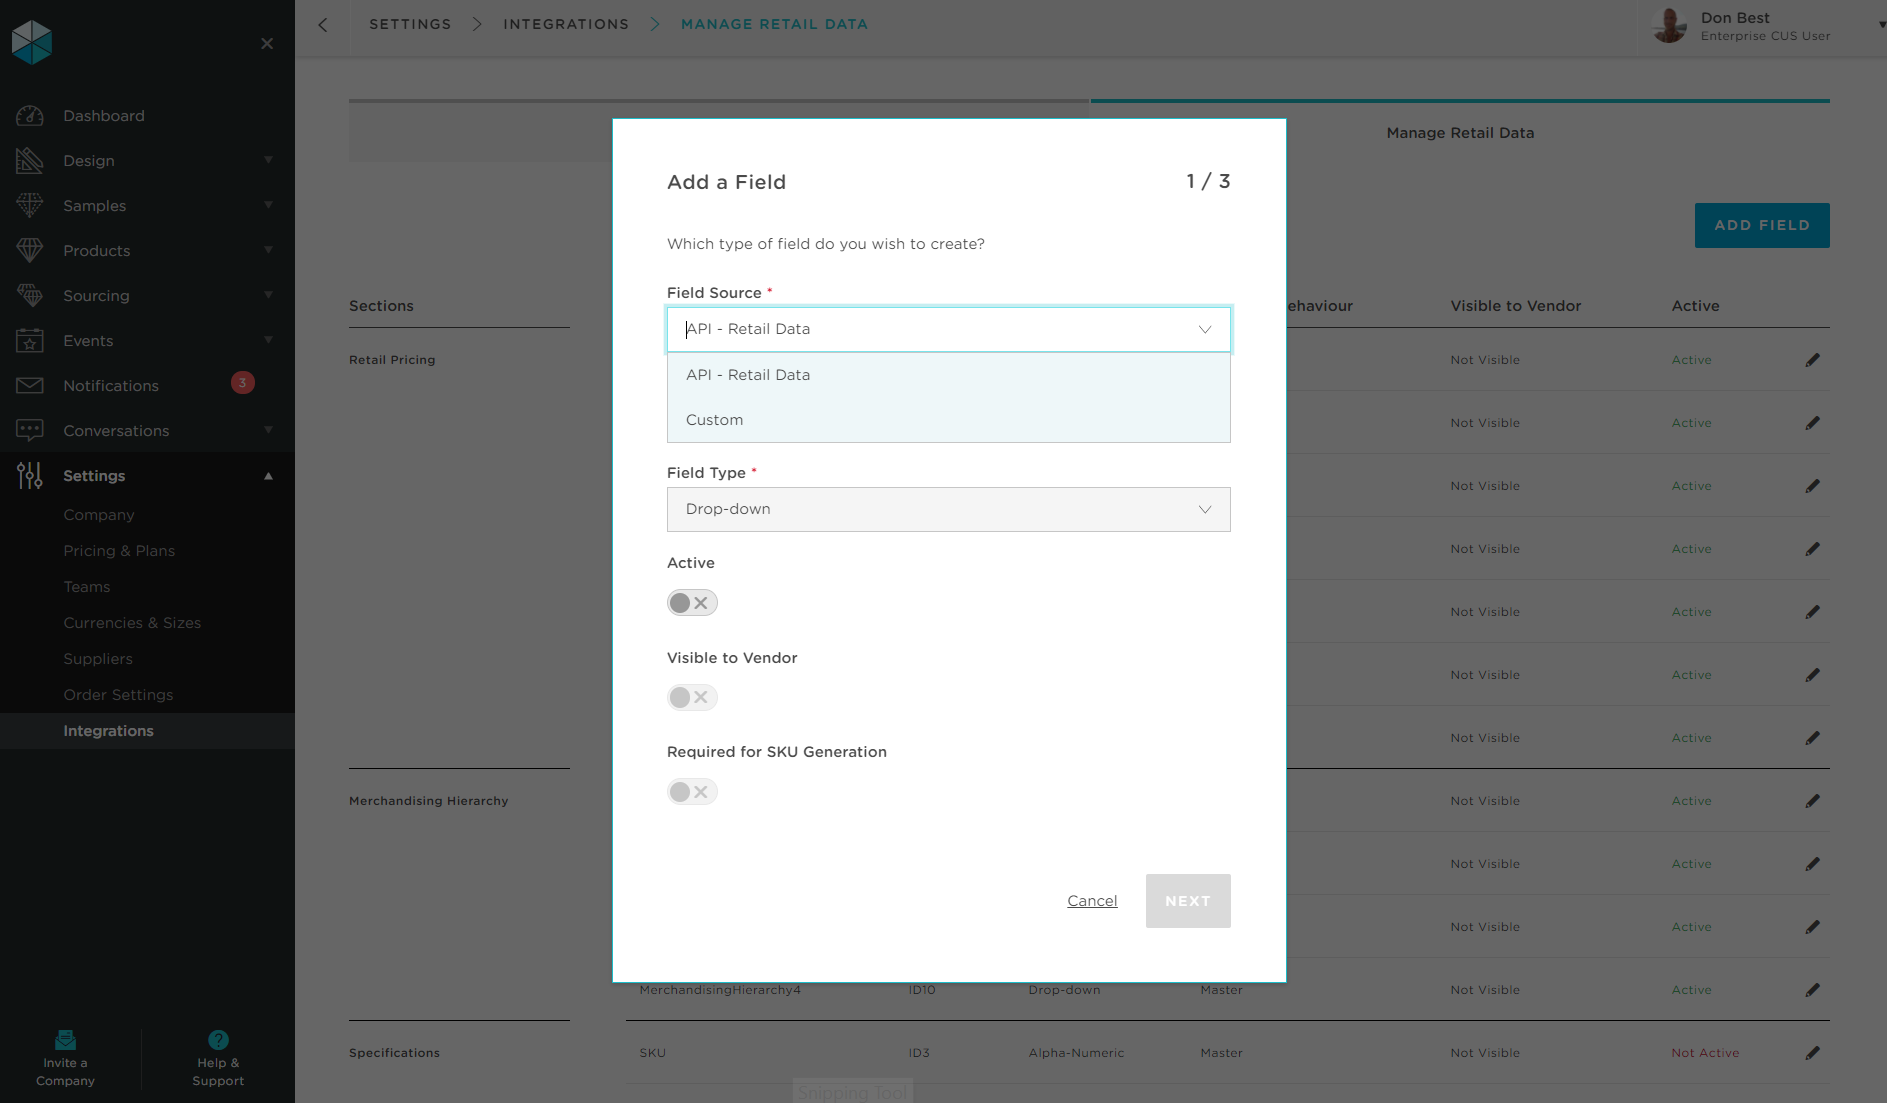
Step 4: Give your field a Title and select Field Type as per your system requirement.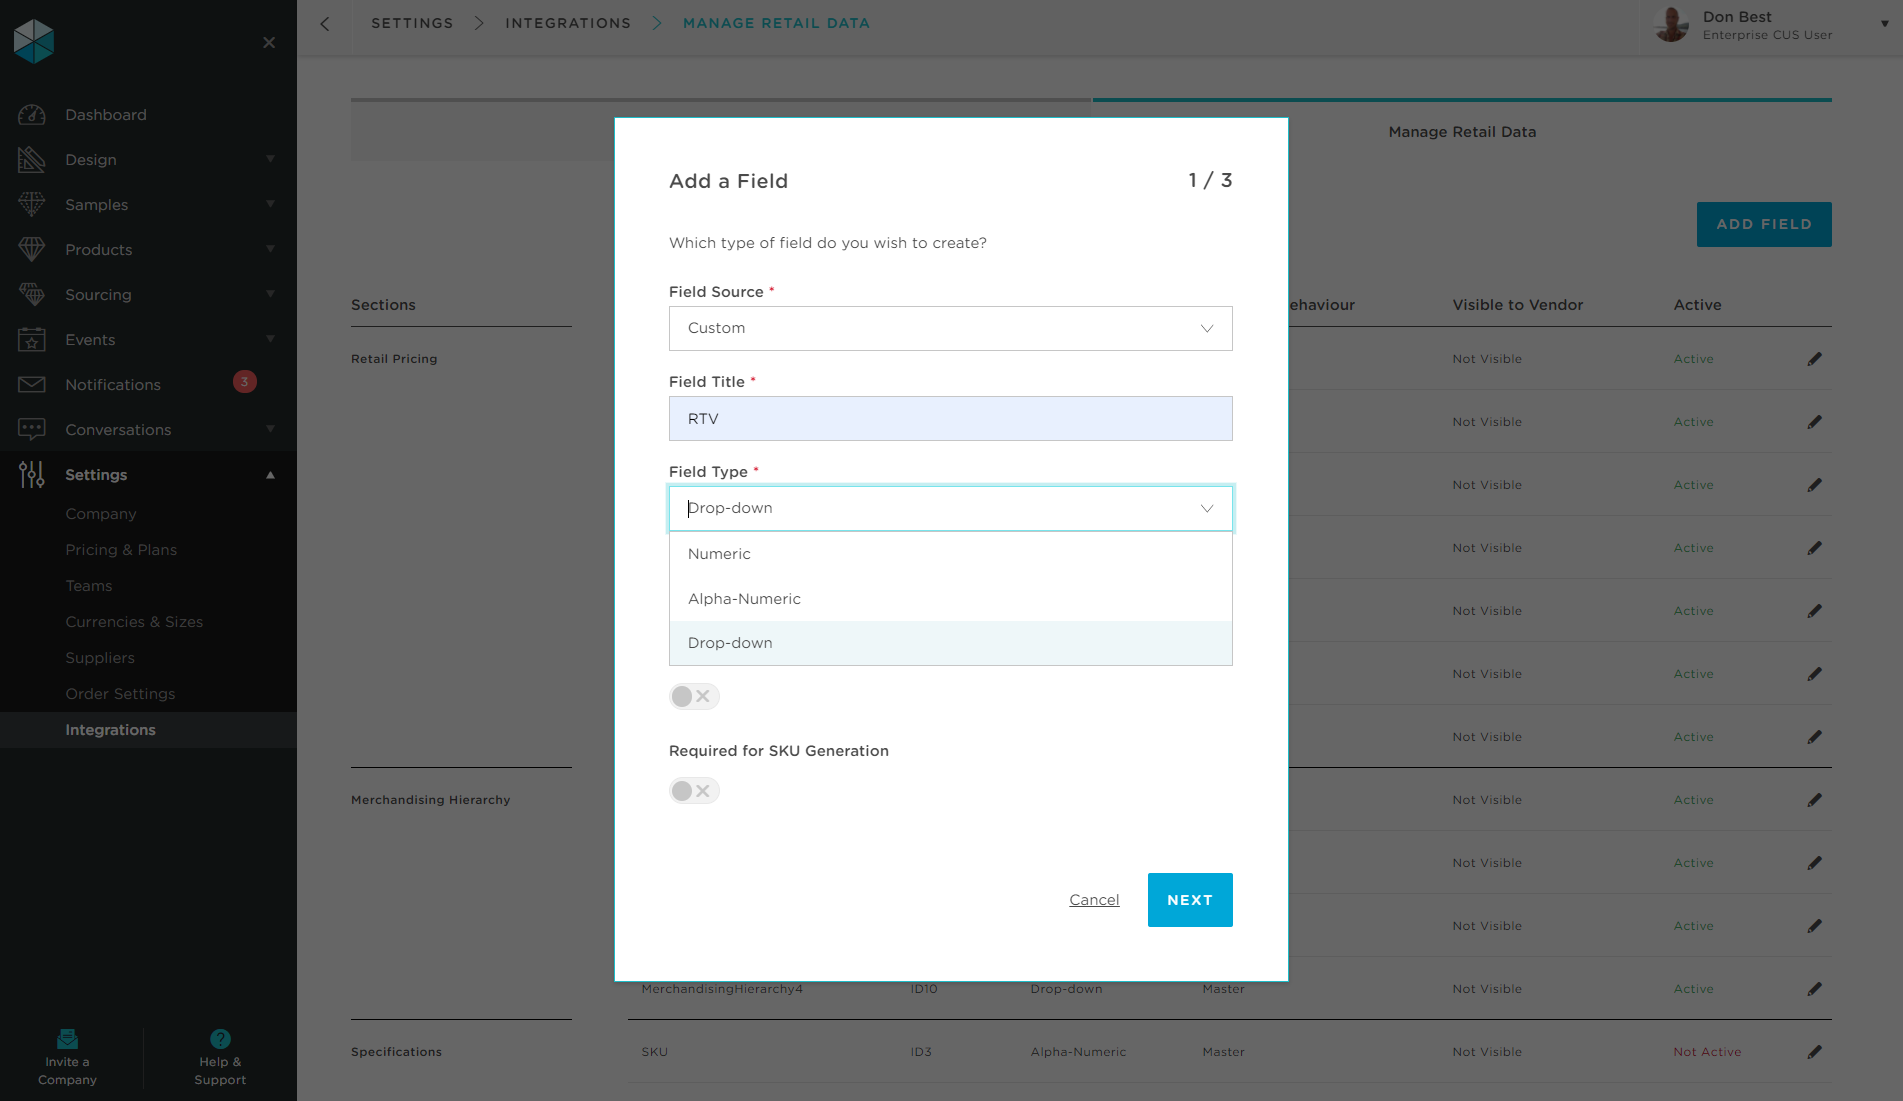
Step 5: Now set the rules for this field.
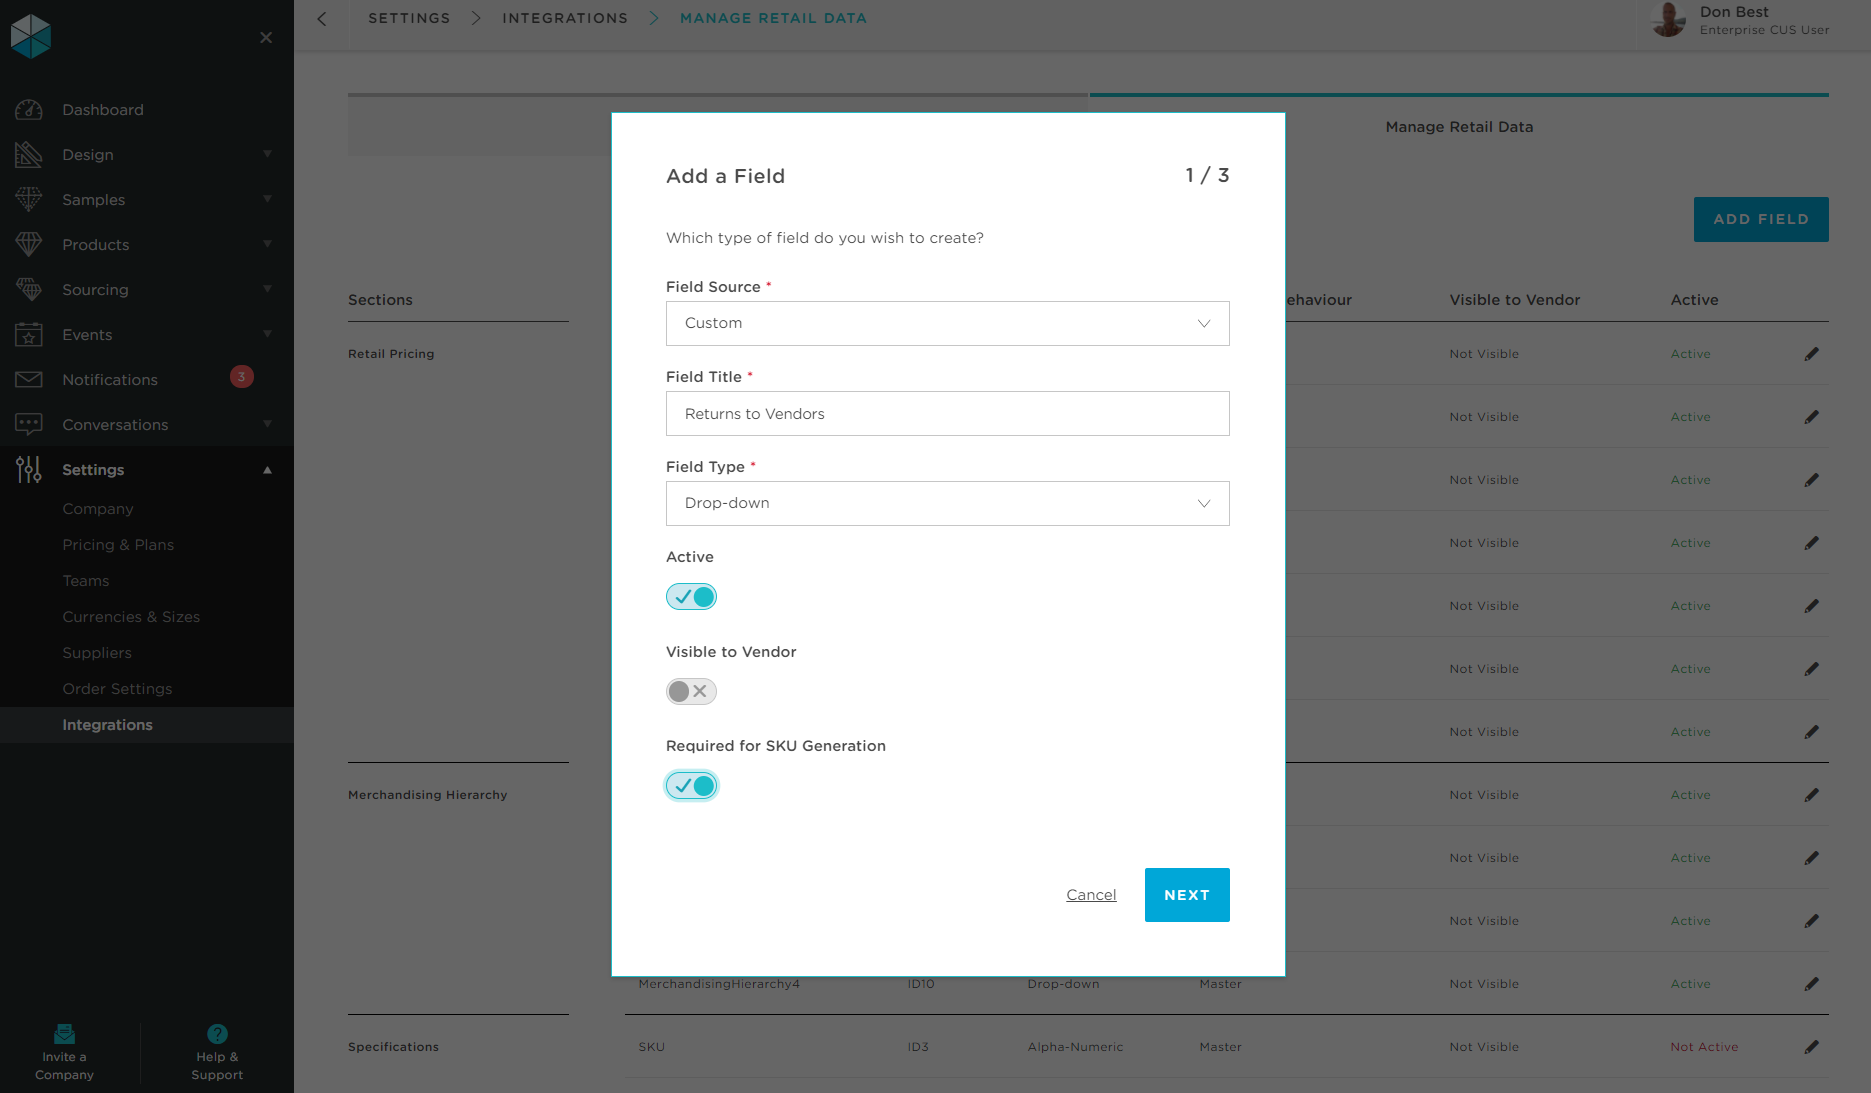
📔 Notes:
- Active - Switch the toggle ON if you want this field to be visible to the buyers.
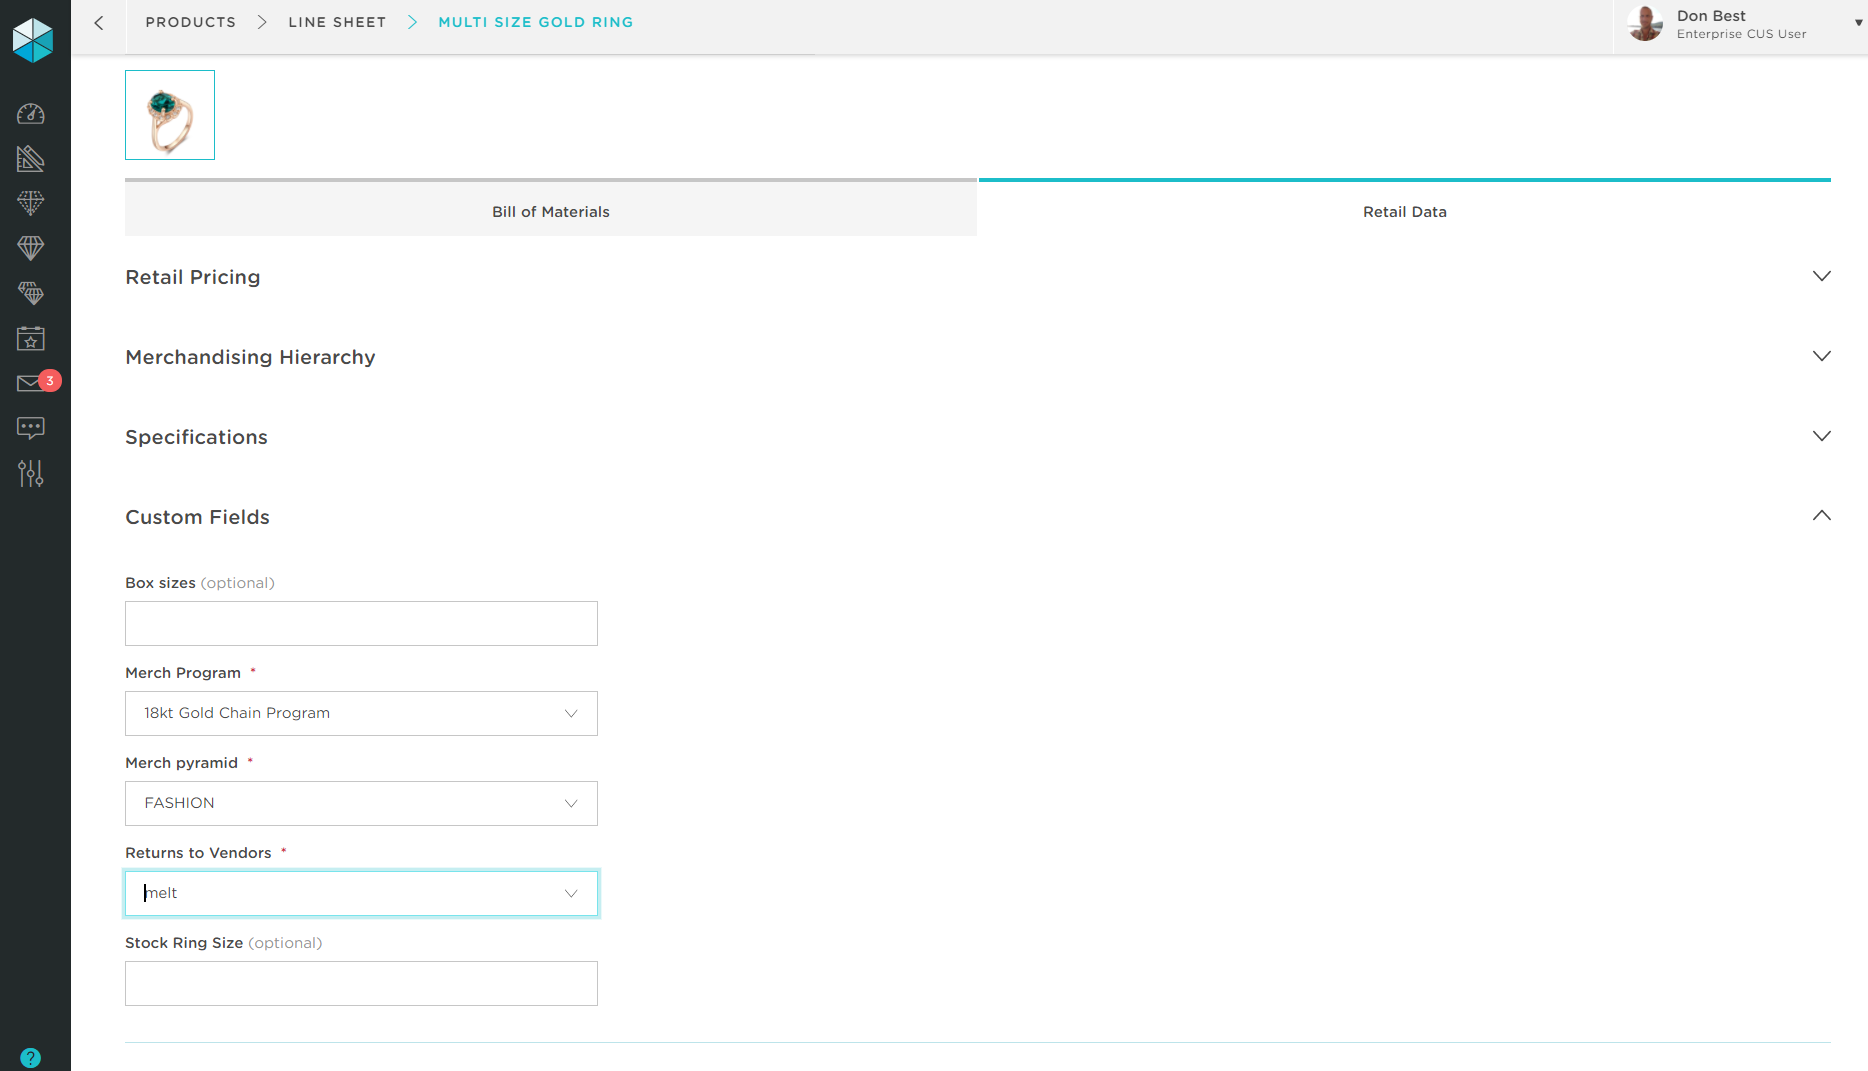
- Visible to Vendors - Switch the toggle ON if you want this field to be visible to the vendors.
- Required for SKU Generation - Switch the toggle ON if your SKU generation system requires this parameter to create a new SKU.
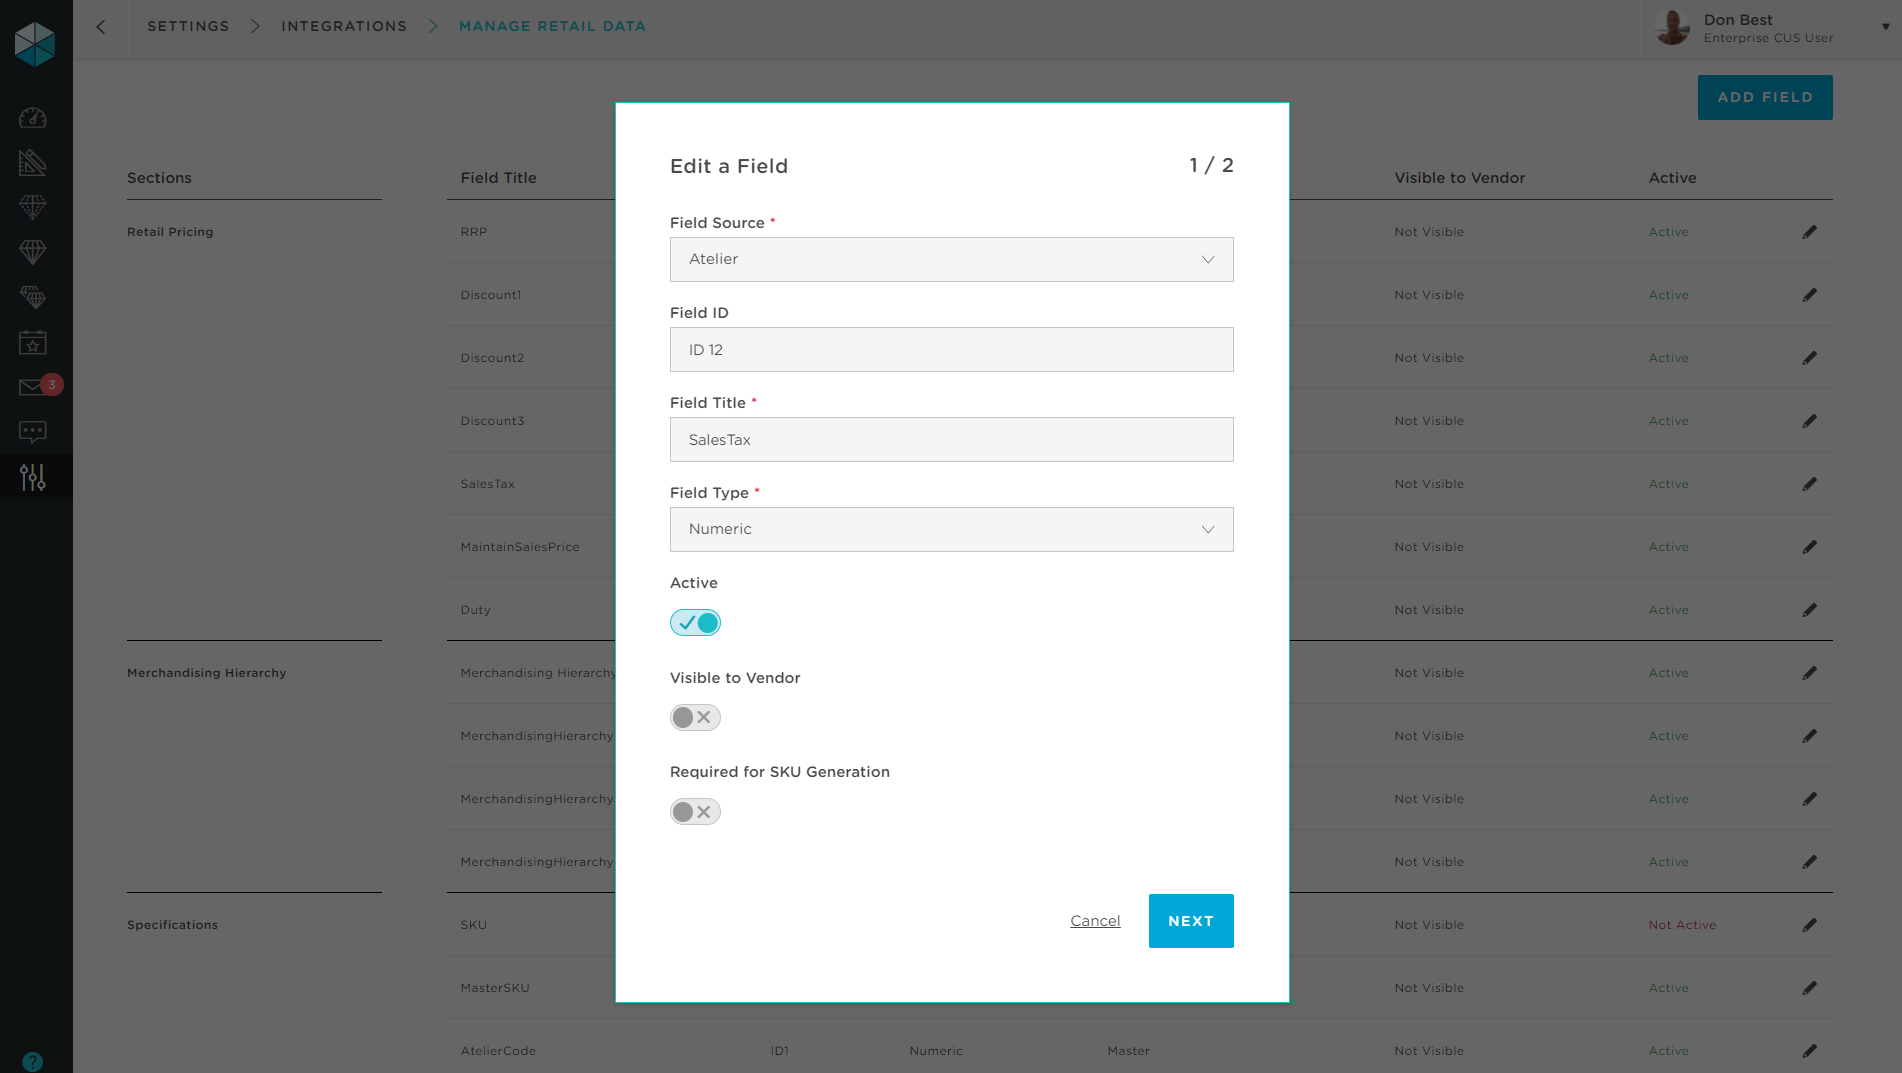
Step 6a: (Only for API fields with automated attribute management):
Now select the Foundational Data parameter you wish to link to your field, and be sure to check the contained attributes are as intended.
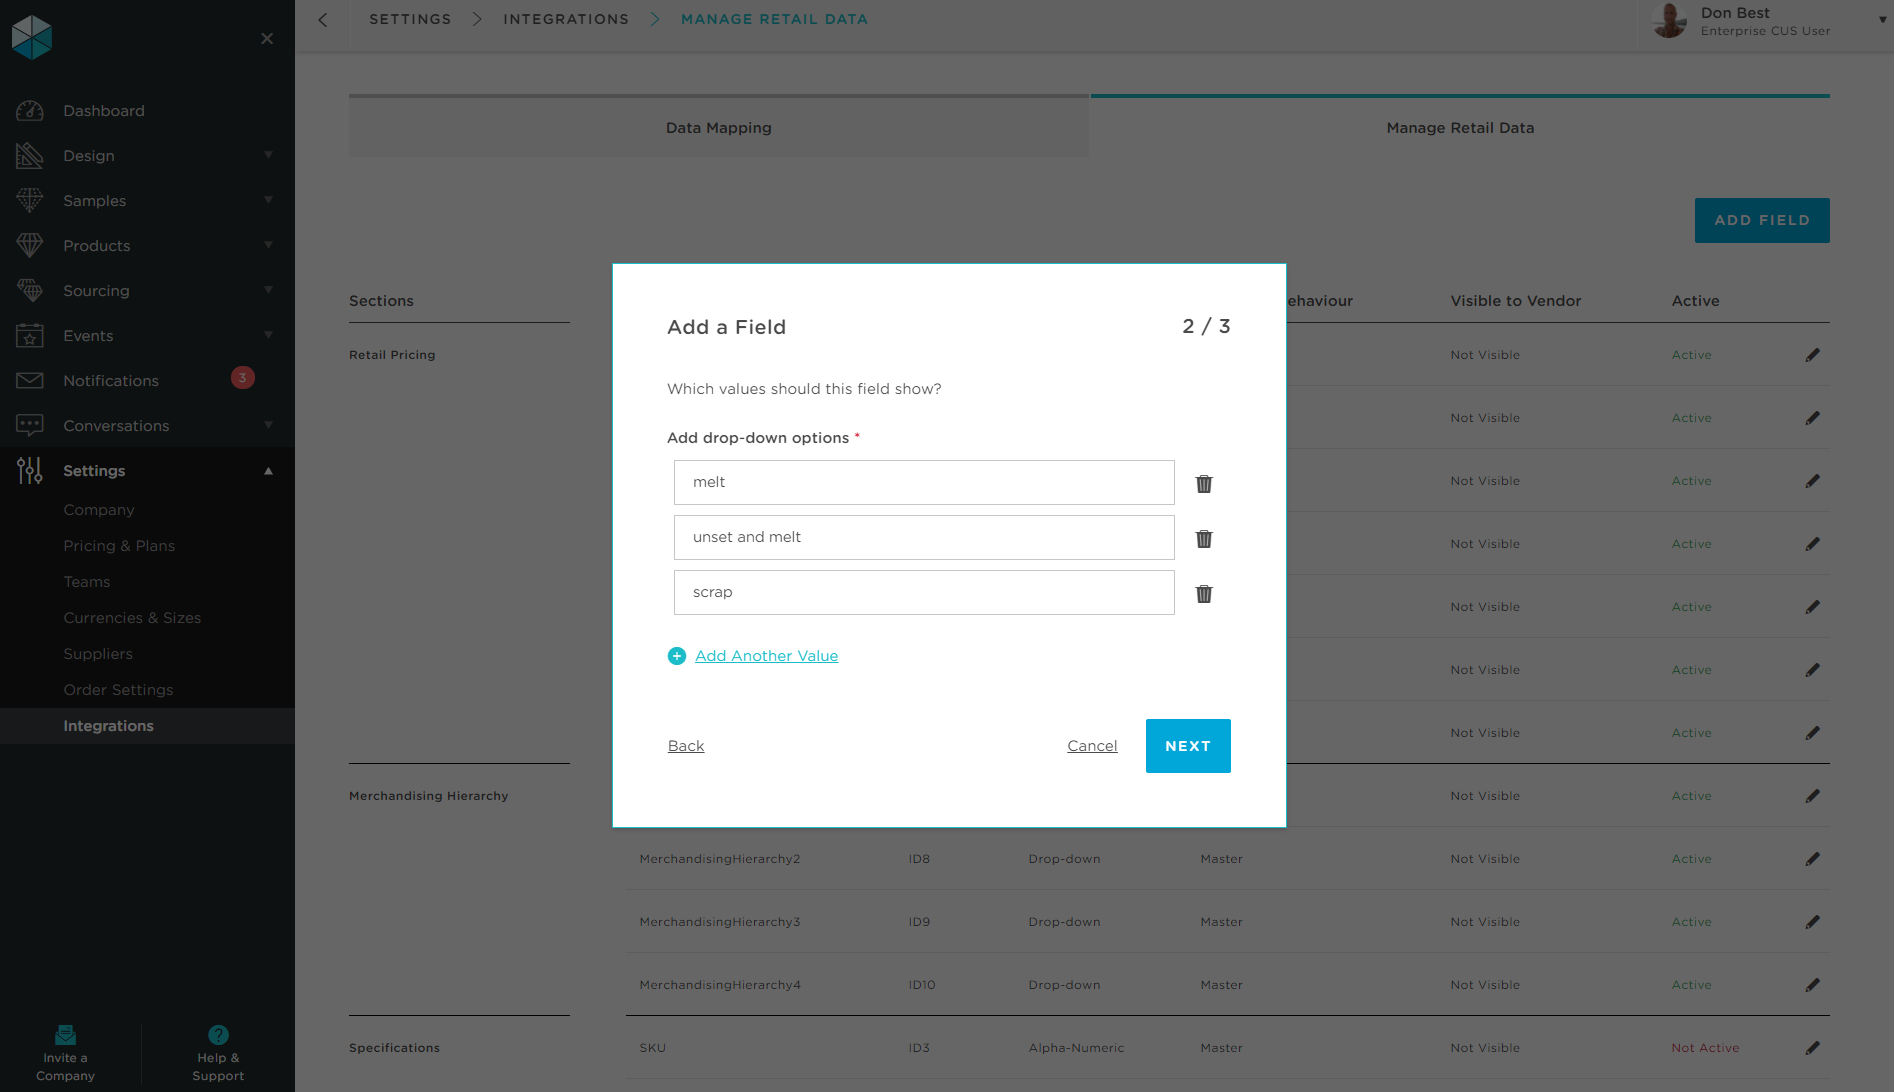
Step 6b: (Only for Custom fields with manual attribute management):
Now add attribute values required for the custom field.
Step 7: Choose how you want this field to behave after a product carries a SKU code.
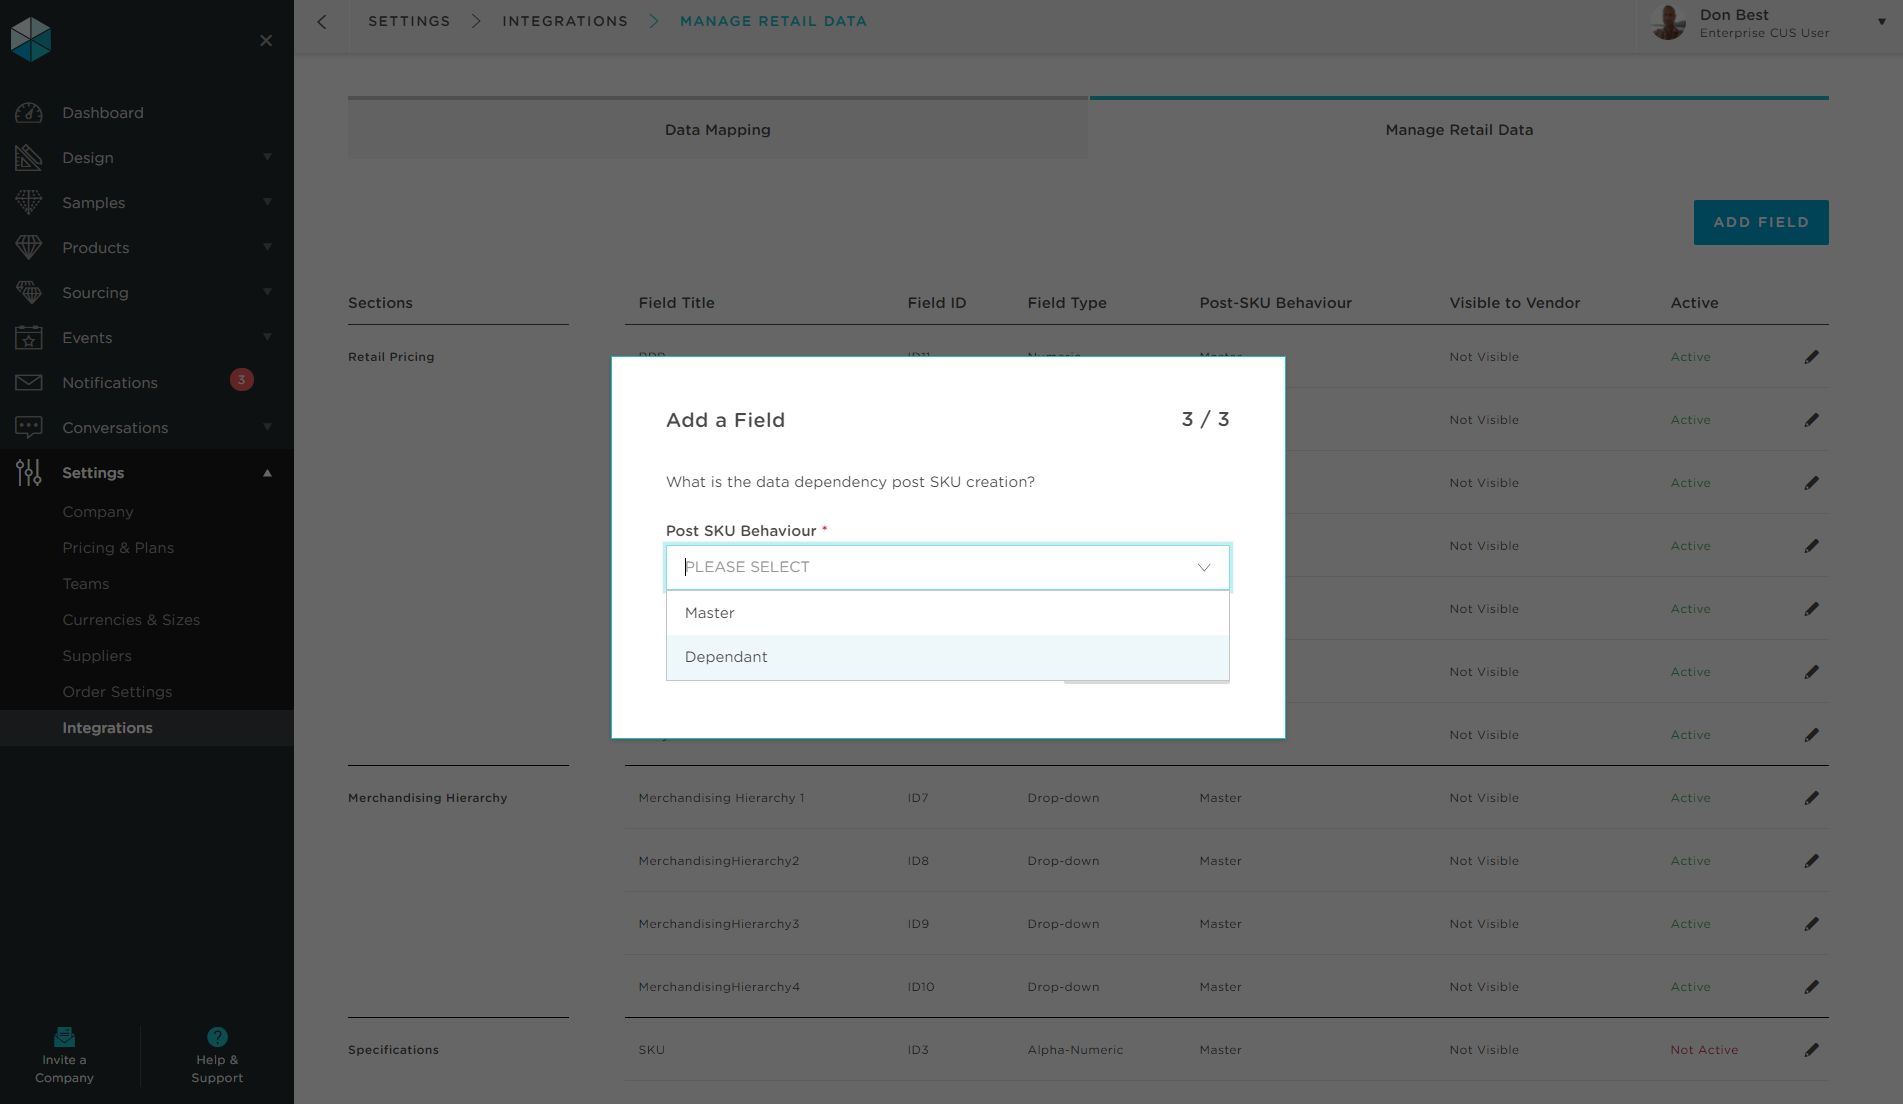
⚠️ Warning: Post SKU behaviour
This means you need to set the direction of the dependency post SKU creation. In other words, do you want your system to drive this field OR do you want values in Loupe to update your system?
Master: Any SKU with this field, value can be updated only via Loupe and your internal system will only update after receiving a new value via BoM Export API.
Dependant: Any SKU with this field, value can be updated only via your internal system and Loupe will only update after receiving a new value via SKU Integration API.
Step 8: To edit a field, click on the pencil icon and update the details.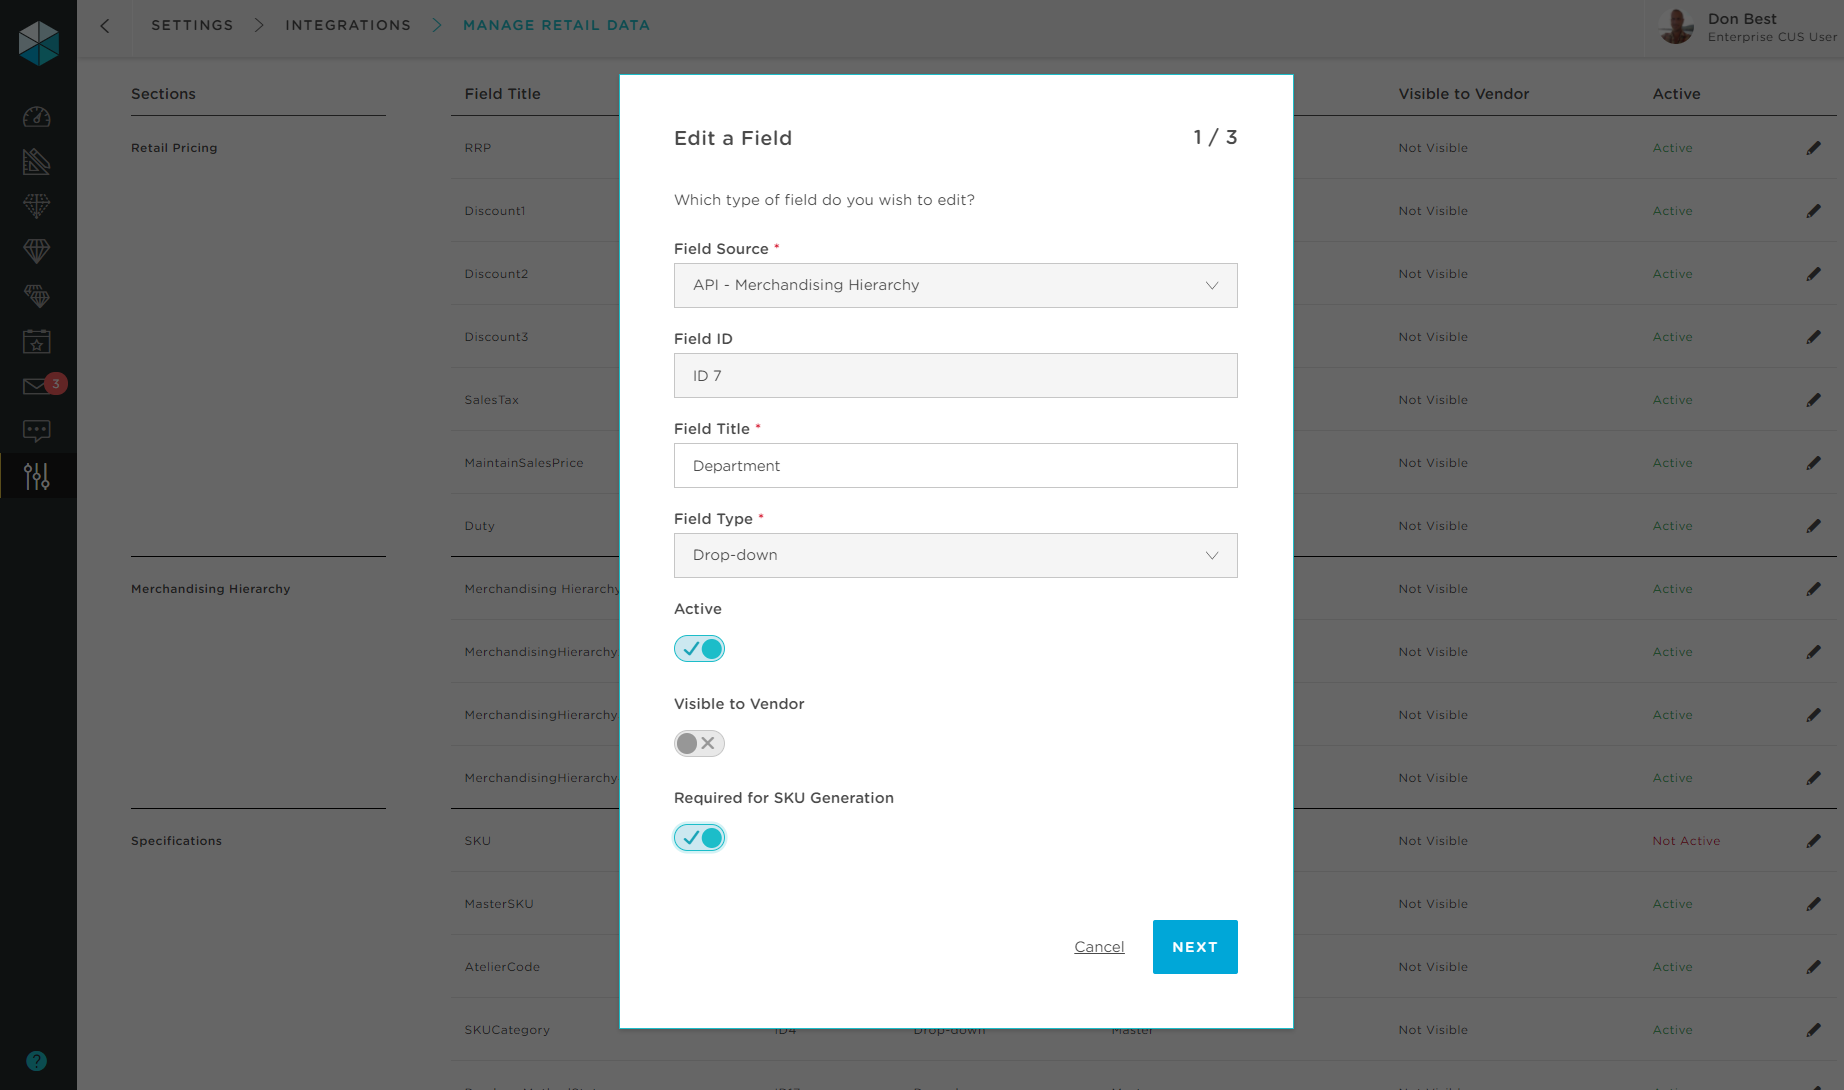
Step 9: To delete a field, click on the Trash icon and update the details.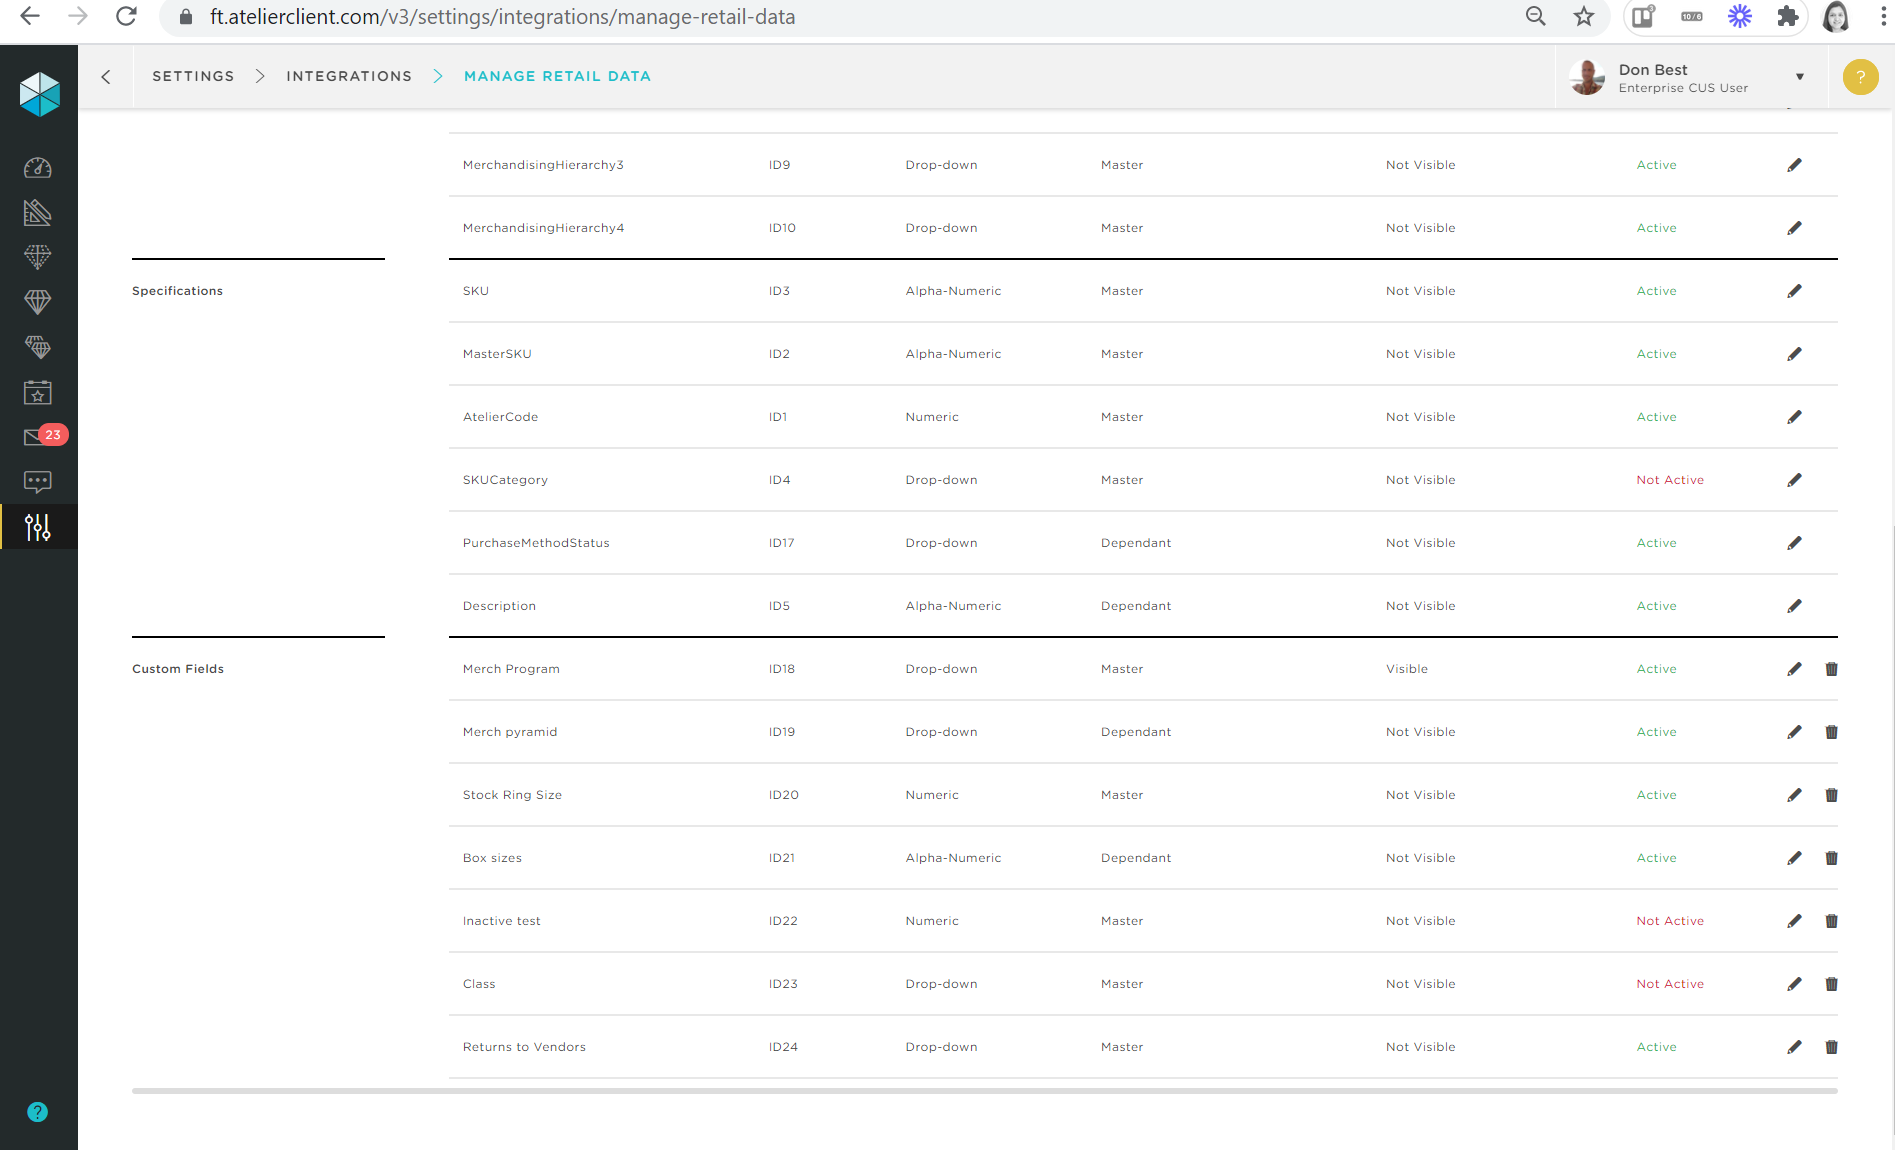
Step 10: View all your actions on Data Mapping tab.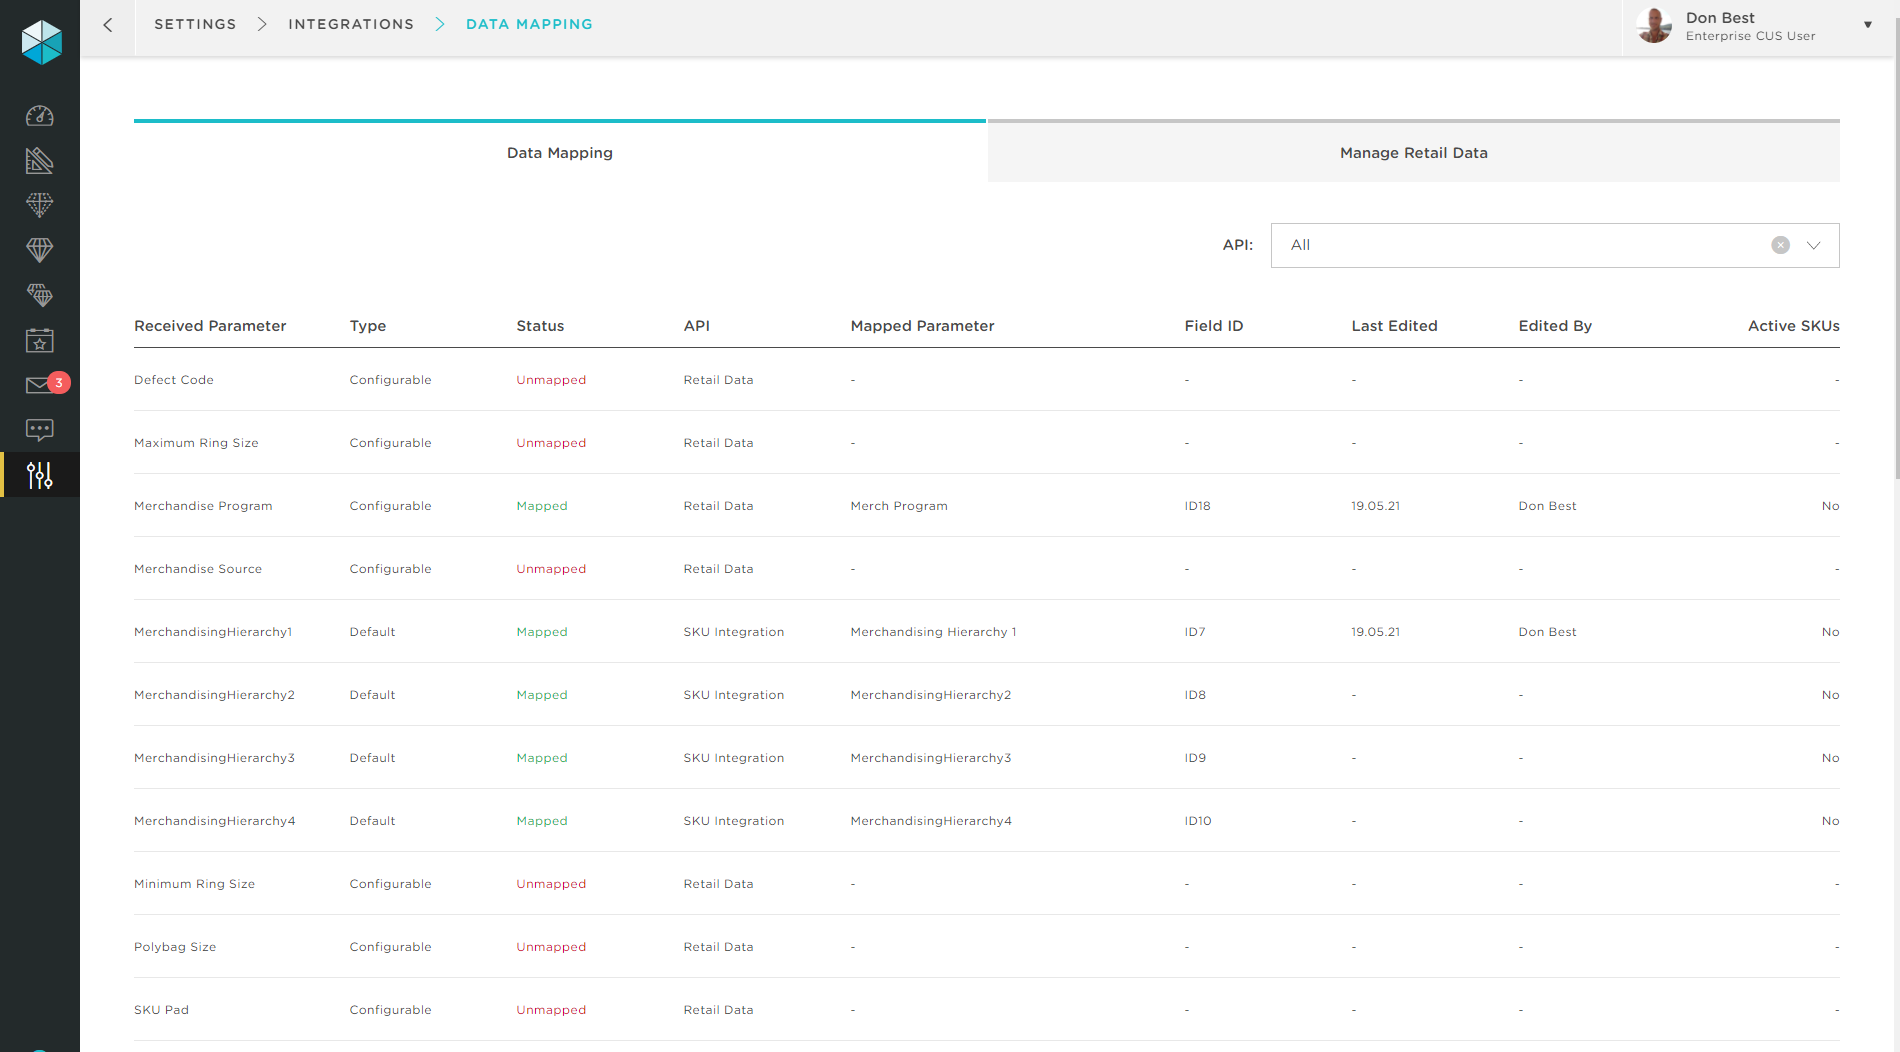
Step 11: Now all active fields and pre loaded attributes will be visible to your buyers to choose from when they are preparing a product for a SKU request.